


Make your own sensory toys – Creative DIY instructions for children aged 3 and up
Hi, I'm Julia, the founder of Flowfull and mother of two little, curious explorers. I love making sensory toys for my children. It's so much more than just a fun craft idea for a rainy afternoon. It's a fantastic way to specifically support your child's development with things you probably already have at home. Instead of spending a lot of money, you create unique sensory experiences tailored precisely to your child's preferences and needs.

Why homemade sensory toys are simply priceless
I know this all too well: The children's room is bursting at the seams, and yet it's often the simple, homemade things that captivate my children the longest. That's precisely where the magic lies for me. It's not about creating the perfect toy, but about spending time together and experimenting with everyday materials.
This process creates a completely different, much deeper connection to play. For example, when my four-year-old son and I make a simple "feel box" out of an old shoebox, he's not just the one playing with it—he's the creator. He helps choose what goes inside: soft cotton wool, rough pine cones from our last walk in the woods, or smooth pebbles. This active participation boosts his self-confidence and makes him incredibly proud of his creation.
The advantages go far beyond the fun of the game.
Homemade sensory toys aren't just a budget-friendly alternative. They're incredibly valuable educational tools that specifically support development. Every handmade piece is truly unique, allowing you to tailor it precisely to your child's interests and current developmental stage.
- Individual support: You know your child best. Do they prefer quiet, calming stimuli or do they need loud, exciting noises? You can tailor the toys precisely to their needs.
- Creativity and problem-solving: The crafting process itself stimulates the imagination. Children learn to see materials in a completely new way and to find creative solutions to small challenges.
- Awareness of materials: Children from the age of 3 playfully learn about the properties of different textures and fabrics. They literally grasp the difference between rough and smooth, hard and soft.
This conscious approach to materials perfectly aligns with a larger trend many families are embracing today: sustainability is becoming increasingly important. A 2023 survey revealed that sustainability plays a crucial role for approximately 65% of German parents when choosing toys. Homemade toys made from natural or recycled materials naturally tap into this desire for more conscious consumption.
As a mother and founder, I see every day how important it is to give children space for their own discoveries. Homemade toys decouple play value from purchase price and put the experience at the center – an invaluable benefit for a child's development.
A treasure trove for families, daycare centers and therapists
The principles of sensory play are universally applicable. A homemade sound board can captivate an entire group of four- to five-year-old children in a daycare center and playfully train their auditory perception. In occupational therapy, a custom-filled sensory bottle can help a child concentrate better or calm down after a challenging situation.
This table summarizes why homemade sensory toys are an excellent choice for families, nurseries, and therapists.
Advantages of DIY sensory toys at a glance
| aspect | Benefit for your child (from 3 years old) | Advantage for you (parents/educators) |
|---|---|---|
| individuality | The toy perfectly matches one's own preferences and current stage of development. | They can specifically promote certain skills and respond to the child's needs. |
| creativity | The child becomes an inventor and learns to solve problems creatively. | This creates valuable time together, which strengthens the bond. |
| sustainability | Learn about the value of everyday objects and recycling. | You save money and act in an environmentally conscious way. |
| Sensors | Direct interaction with materials intensively trains all the senses. | They have full control over the materials used and their safety. |
| self-efficacy | The child experiences pride and strengthens their self-confidence through their own work. | They can convey learning content in a playful way and with simple means. |
The flexibility of DIY toys makes them an ideal tool in any environment dedicated to child development. They support the fundamental processes of sensory processing—a topic absolutely central to every child's development. If you'd like to delve deeper, read more in our magazine about what sensory integration in children entails and why it's so incredibly important.
Choosing safe materials for little explorers
Before we delve into our craft supplies and unleash our creativity, we need to talk about the most important thing in any DIY project with children: safety. As a mother of two curious explorers aged four and six, I know from experience that homemade toys have to be durable and, above all, completely safe. Every material we use is therefore thoroughly inspected – a practice that proves its worth not only at home, but also in daycare centers and therapeutic settings.
The good news is: you don't need to raid a specialty craft store. You probably already have many of the safest and most exciting materials for making your own sensory toys at home. It's just a matter of seeing them in the right light.
The Yes-Please List: Safe everyday materials
When scouring your home for potential crafting treasures, look out for things that are large enough not to be swallowed and that do not have sharp edges.
My personal selection, tried and tested over years, for children aged three and up includes:
- Cardboard tubes and boxes: These are the absolute classics. Sturdy, versatile for painting and decorating, and completely without any nasty corners.
- Fabrics with different textures: old cotton T-shirts, denim scraps, felt or a piece of jute – all of these offer wonderful tactile appeal.
- Natural materials: Larger, smooth pebbles, chestnuts, thick branches (without sharp ends!) or dry, large leaves are treasures from nature.
- Food items (for supervised play only): Uncooked pasta in large shapes like rigatoni, dry lentils, or rice are great for pouring games or sensory boxes. Remember: Play should always be supervised.
These materials are not only practically free and sustainable, but also naturally non-toxic and safe, as long as they are appropriate for the child's age.
The No Thanks List: What you should absolutely avoid
Just as important as choosing the right materials is knowing what should absolutely be kept out of children's hands. Special care is needed here, especially with young children who still like to explore the world with their mouths.
As a general rule, anything that fits through an empty toilet paper roll poses a potential choking hazard for children under three. Even with my older children, I make sure that small parts are only used under supervision.
Some things are simply taboo when crafting with children:
- Small items: beads, buttons, small coins or tiny decorative stones.
- Pointed or sharp-edged objects: paper clips, thumbtacks or glass marbles have no place here.
- Toxic substances: When buying paints, adhesives and modeling clay, always look for the "child-safe" or "saliva-resistant" (EN 71) seal.
- Raw legumes: Uncooked beans or chickpeas can swell dangerously in the moist environment of the nose or ears and are also toxic when raw.
Careful material selection is therefore the first and most important step. If you'd like to delve deeper into the different types of sensory toys and how they promote development, you'll find further valuable insights in our magazine. So, now that we have all our materials safely gathered, we can finally turn to the creative instructions.
Discovery bottles: Visual stimuli for quiet moments
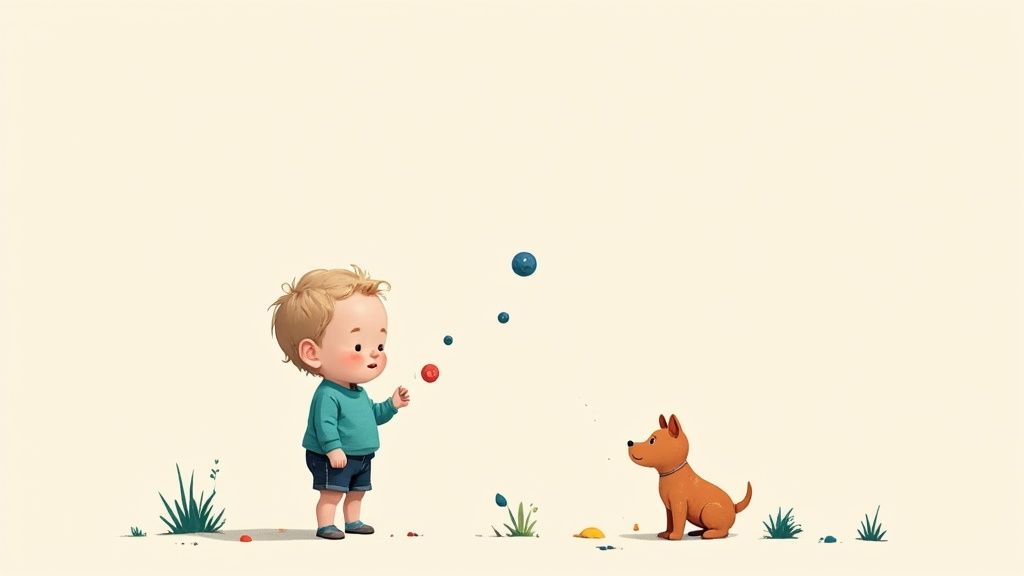
Let's start with an absolute classic that's always a hit with my two children and is also a proven tool in daycare centers: the sensory discovery bottle. These little "magic bottles" not only look beautiful, they're real little helpers in everyday life. They help children to calm down, concentrate, and better process visual stimuli.
When my four-year-old is completely overexcited after a hectic day at daycare, the gentle floating of the glitter often works wonders. It's exactly the impulse he needs to calm down again. This kind of visual stimulation has a soothing effect on the nervous system and helps children regulate their emotions – an incredibly important skill that they develop intensively between the ages of three and five.
Find the right base for your bottle
The first step is choosing the right container. Safety is absolutely paramount here, so I advise against glass bottles, even if they might look more elegant. The risk of breakage is simply too great.
Small, sturdy plastic bottles are the best choice for our DIY sensory toy . Empty and thoroughly cleaned drinking bottles made of robust, clear plastic are ideal. Make sure the bottle neck is wide enough to easily add smaller items later. Remove all labels so the magical contents remain visible.
My personal tip: I prefer to use small, smooth smoothie bottles from the supermarket. They fit perfectly in children's hands, are extremely sturdy, and the labels can usually be peeled off without leaving any residue.
This simple graphic summarizes the three key steps to designing your very own sensory bottle.
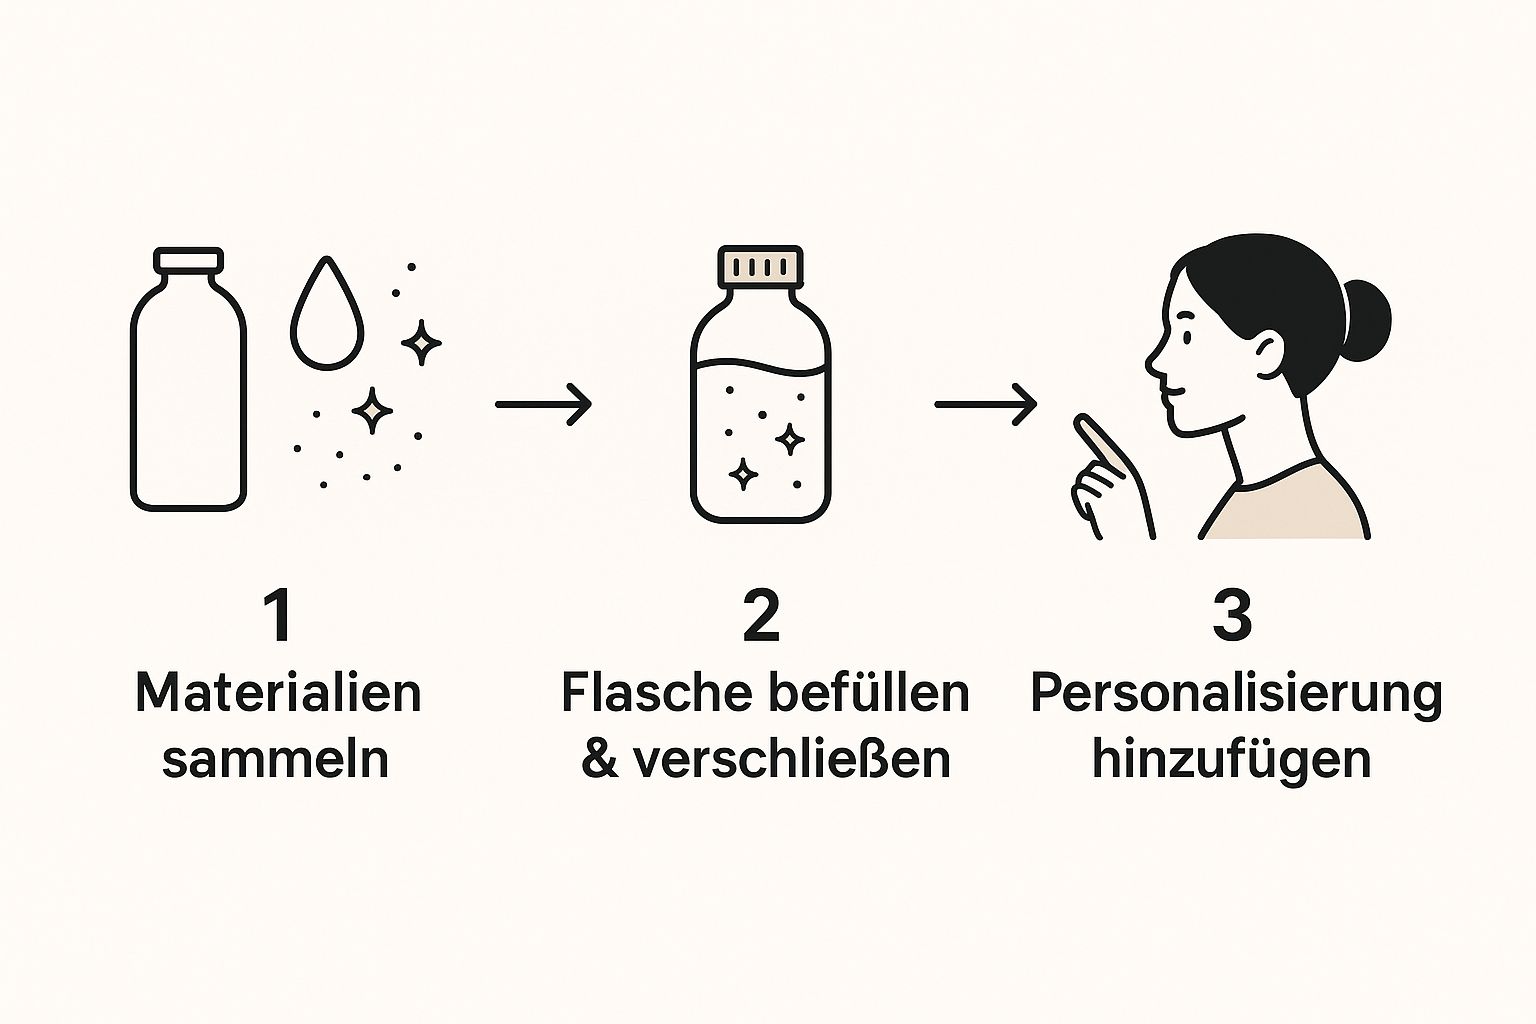
As you can see, it's basically a simple interplay of collecting, filling and securely sealing – refined with a pinch of creativity.
Fillings for fascinating themed worlds
Now it's time to get creative, and this is where the kids can really get involved! Combining different liquids and solids creates all sorts of different effects. A mixture of water and baby oil, for example, creates this fascinating lava lamp effect, where glitter particles slowly dance between the two layers of liquid.
Here are two of my tried and tested favorite recipes:
-
Glittering galaxy nebula:
- Fill the bottle halfway with warm water.
- Add a generous tablespoon of clear craft or glitter glue and stir well until dissolved.
- Now sprinkle in plenty of fine glitter in dark tones such as blue, purple and silver, along with a few small star-shaped sequins.
- Fill with water, but leave a small air space at the top.
-
Tranquil underwater world:
- Fill the bottle about two-thirds full with water.
- Add one drop of blue food coloring and shake vigorously.
- Place small, light items inside, for example mini plastic fish, shells (without sharp edges!) and a few transparent water beads.
- Fill the rest with baby oil. This makes the objects float much more slowly and creates a calming wave effect when shaken.
Don't be afraid to experiment! Even natural materials like small, clean pebbles, flower petals, or tiny pine cones can create amazing effects.
Last but not least: the sealing.
To ensure the discovery bottle brings joy for a long time and, above all, safely, the lid must fit securely. Nothing is more annoying than a glittery mess spilling out into the children's room or bag.
Apply a generous amount of hot glue or strong superglue to the inner threads of the lid. Then immediately screw it onto the bottle as tightly as possible. Allow the glue to harden completely before giving the bottle to children. Test firmly yourself to ensure the lid is truly unopenable. This way, the sensory toy is perfectly equipped for the hustle and bustle of everyday life in families and daycare centers.
Now it's the hands' turn: stimulating the sense of touch with tactile memory and touch box
After making their eyes light up with the discovery bottles, it's time to explore the sense of touch. For children aged three and up, the sense of touch is incredibly important for truly grasping the world. I see it every day with my own children: everything wants to be touched and explored. We're harnessing this very curiosity for two of my absolute favorite projects: a homemade tactile memory game and a mysterious touch box.

Both toys are incredibly quick to make and sharpen tactile perception, the ability to recognize and categorize different stimuli through the skin. This is an important foundation for good fine motor skills and concentration.
A tactile memory game for nimble fingers
Everyone knows a regular memory game. But have you ever tried playing with your hands instead of your eyes? A tactile memory game is an ingenious variation that puts your sense of touch and memory to a completely different test. Instead of searching for matching pairs of pictures, the goal is to find pairs with the same surface texture – ideally with your eyes closed, of course.
You probably already have what you need at home:
- Sturdy cards: Thick cardboard, old beer coasters, or square wooden boards from the hardware store are ideal. The main thing is that they can withstand some wear and tear.
- Exciting materials: Now it's time to get creative! Look for anything that feels interesting. The only important thing is that you have two equally sized pieces of each material.
- Good adhesive: An all-purpose adhesive or a hot glue gun ensures that everything is still in its place even after many rounds of play.
Simply cut the materials to size and glue them onto the cards – and you have a unique game. It doesn't just stimulate the sense of touch, though. Ask your child how the surface feels, and you'll be playfully developing their language skills: "Is it rough like our cat's tongue or soft like your pajamas?"
Material ideas for your tactile memory game
| category | Examples | What it promotes |
|---|---|---|
| Rough & Grainy | Sandpaper, jute, coarse fabric | Differentiation of rough textures, sensitivity |
| Soft & Fluffy | Felt, cotton wool, velvet, a piece of teddy bear fur | Soothing stimuli, description of softness |
| Smooth & Textured | Corrugated cardboard, aluminum foil, foam rubber, a piece of leather | Pattern recognition, fine perception |
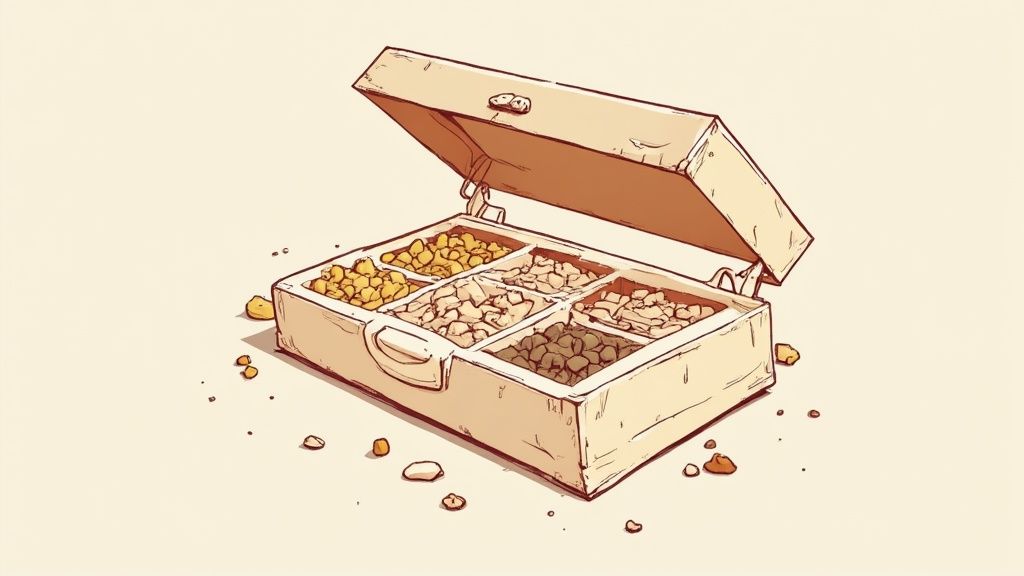
The mysterious touch box made from a shoebox
Even quicker and just as exciting is the touch box. My four-year-old loves the guessing game! A simple shoebox becomes a treasure chest, the contents of which can only be guessed by touch. It's perfect training for concentration and imagination.
Simply take a shoebox and cut a hole in one of the short sides, large enough for a child's arm. For an extra element of surprise, you can cut off the cuff of an old sock and glue it over the hole from the inside, like a curtain. That way, no one can peek inside.
The best thing about the tactile box is how versatile it is. Today it contains found objects from the forest, tomorrow kitchen utensils. This keeps the game exciting and adaptable to any learning objective – whether at home, in kindergarten, or in therapy.
Now fill the box with various safe objects. Your child reaches in without looking and tries to describe and guess the object by touch alone. Questions like "Is it hard or soft? Does it have corners? Does it feel cold?" will help them along the way and promote vocabulary development.
Sensory learning games like these are very popular. A large part of the growth in the toy market comes from the increasing demand for games that specifically address motor, cognitive, and sensory skills. Sensory toys are particularly in demand because they promote sensory perception and hand-eye coordination, even in the youngest children. If you would like to read more about trends in the German toy market , you will find some fascinating insights there.
With these two ideas, you have two great tools at hand to take the topic of making your own sensory toys to the next level and playfully awaken your child's sense of touch.
Auditory adventures with a self-built sound wall
We've already touched, felt, and explored – now it's time to listen closely! The world of sound is a vast and incredibly exciting field for children. Noises, rhythms, and melodies awaken emotions, promote concentration, and are simply fun. Instead of immediately buying expensive instruments, we're creating a real highlight for any child's room, group room, or even the garden: a homemade sound wall.
This project not only looks impressive, but it also invites children from the age of three or four to experiment to their heart's content. Here they can be loud or quiet and, almost incidentally, develop a sense of rhythm. I can say from experience: My two children love "making music" with simple wooden spoons on our sound wall in the garden. It's a wonderful way to release excess energy creatively and with great joy.
The stable foundation for your sound orchestra
First, our sound wall needs a solid base, as it must withstand even intense drumming. Depending on where the wall is to be placed, there are very different options.
For indoor use, a sturdy wooden board – for example, an OSB or plywood board from a hardware store – is ideal. It's important to sand the edges well to prevent splinters. Outdoors in the garden, a robust trellis panel , a section of old garden fencing, or even a wooden pallet can provide a fantastic base. The main thing is that the structure is stable or securely attached to a wall.
Collect your musical treasures
And now comes the most fun part, which the whole family can join in on: the hunt for anything that makes interesting noises! You'll be amazed at the treasures hidden in the kitchen, basement, or workshop. Making your own sensory toys is all about seeing everyday objects in a new light and getting creative.
Here are a few ideas that have proven successful for us:
- For the bright, metallic sounds: old pot lids, discarded baking tins, a whisk or a bunch of old keys.
- For rattling sounds: Empty and clean yogurt cups or small containers filled with rice, lentils or pebbles make great rattles.
- For the muffled tones: Empty plastic buckets, thick bamboo sticks or hollow pieces of wood provide the deeper sounds in the orchestra.
- For special effects: An old bicycle bell, small bells or perhaps even a disused xylophone can be great highlights.
This very diversity is key. Children learn to distinguish, categorize, and use sounds in a very targeted way. It's so much more than just making noise – it's an early form of musical expression and greatly improves their hearing.
By offering children a wide variety of sounds without telling them what "real" music is, we open the door to their own creativity. A sound wall is not an instrument with fixed rules, but an open field for experimentation.
Secure fastening for long-lasting fun
To ensure everything stays in place but still sounds good, proper mounting is essential. The items must be mounted firmly enough to withstand playing, but at the same time be able to vibrate enough to produce a beautiful tone.
Sturdy cords, cable ties, or screws with washers are best suited for this purpose. Make sure that no sharp points protrude and that all cords are short enough to prevent any risk of strangulation. Simple wooden spoons, thick sticks with rounded ends, or even just your hands make perfect "percussion instruments."
Such projects not only stimulate the senses, they can also help break down stereotypical gender roles. A sound wall is a wonderfully gender-neutral toy that appeals to all children equally and invites them to explore together.
A sound wall is the perfect example of how sensory play combines motor and cognitive skills. If you'd like to delve deeper into this topic, you'll find many more valuable tips and suggestions in our guide to sensory play at home .
Answers to frequently asked questions about DIY sensory toys
After all these craft ideas, you probably have a few questions swirling around in your head. Everyone feels that way! In my workshops and conversations with parents and educators, the same very practical considerations keep coming up. That's why I want to round off this guide with a short Q&A session, addressing the points that are raised most frequently.
Think of this as a little help to get you started, clearing up any remaining uncertainties. Because ultimately, the most important thing about making your own sensory toys is the joy of experimenting and the fun you share with your child.
For what age group are these DIY ideas actually intended?
A crucial question that comes up time and again. Basically, all the projects presented here – from the discovery bottles to the sound wall – are designed for children aged 3 and up . By this age, the oral phase, in which everything is put in the mouth, is usually over. Children can explore materials much more consciously and safely.
Furthermore, they already understand simple instructions and can really help out with the crafting, which makes the whole process a great community experience.
If you want to make something for younger children, you would need to choose the materials much more carefully. This means completely avoiding small parts like rice, lentils, or small buttons. However, the toys shown here are perfectly suited to the motor and cognitive abilities of typical kindergarten children.
How do I keep my homemade toys clean?
Fortunately, caring for them is simpler than many people fear. With a few simple steps, your homemade treasures will stay hygienic and beautiful for a long time.
- Wood & cardboard: Here, less is more. Simply wipe dry. A damp cloth would soften the cardboard or cause the wood to swell unattractively.
- Fabrics & Textiles: The fabric pads from the tactile memory game or similar textiles can be easily cleaned by hand washing. Simply use lukewarm water and a mild soap, then allow them to dry completely before playing again.
- Plastic bottles & boxes: Our sealed discovery bottles only need a wipe on the outside. The sensory box can simply be emptied, wiped clean with a damp cloth, and is then ready for a new refill.
My personal tip from everyday mom life: Make cleaning up part of the game! Emptying and wiping the sensory box together becomes a valuable ritual for children. It's not only fun, but also fosters a sense of responsibility.
And where to put all those great things? Storage tips
Thoughtful storage not only creates order, it also keeps toys interesting. I'm a huge fan of rotation systems – whether at home or in daycare. Instead of leaving everything lying around, I put the toys in boxes or baskets and rotate them regularly.
This way, the tactile memory game or the sound wall remains special and doesn't get lost in the everyday chaos of the children's room. A good trick is to label the boxes with a photo or a small drawing of their contents. Then the children can decide for themselves which treasure they want to unearth today.
If, after all these DIY inspirations, you're now looking for the perfect complement to further ignite your child's imagination, I invite you to discover the world of Flowfull . Our thoughtfully designed sensory boxes and creative cubes are the ideal foundation for countless play worlds and easily grow with your child's needs.
Discover the sensory play worlds of Flowfull now at flowfull.de
