
Build your own motor skills board: A creative guide for little explorers aged 3 and up
Hi, I'm Julia, founder of Flowfull and a mom of two energetic kids myself. Building your own sensory board is one of my favorite recommendations for parents, kindergartens, and therapists. It's a fantastic way to create a truly personal toy, perfectly tailored to your child's curiosity and preferences. The idea is actually quite simple: you take a sturdy wooden board and fill it with all sorts of exciting everyday objects – from locks and switches to zippers. It's a project that's not only creative but also offers tremendous educational value, especially for children aged three and up.

Why a motor skills board is the best DIY idea for children aged 3 and up
As a mother and entrepreneur, I'm always on the lookout for toys that offer more than just short-term entertainment. They should be educational and provide lasting engagement. The homemade motor skills board, often called a "busy board," has become one of my absolute favorites. It's so much more than just a colorful board—it's a tailor-made adventure land for little explorers.
For children aged three, four, or five, a board like this is a real treasure. At this stage, they want to understand the adult world with all their senses. Finally, they can touch and try out all the things that are usually off-limits: flipping light switches, turning keys in locks, or opening and closing buckles.
Targeted support that's actually fun
The great thing is: every single element on the motor skills board serves a purpose. Turning a crank, opening a latch, or threading a shoelace playfully trains important skills. The focus is primarily on:
- Fine motor skills: The small, precise movements of fingers and hands are perfectly trained here. A practical example is opening and closing the screw-top lid of an empty spice jar.
- Hand-eye coordination: The child learns to control their hand movements with what they see. This is a crucial foundation for learning to write later. A key must be guided precisely into the keyhole – a perfect exercise for this.
- Logical thinking: Cause-and-effect relationships become literally tangible. What happens when I flip this switch? Which key fits this lock? Pressing a battery-operated doorbell button that illuminates a light makes this connection immediately clear.
I witnessed my own son (then 4 years old) spend weeks tinkering with a simple padlock. The moment he finally managed to open it on his own was priceless. The immense pride on his face – a true milestone for his self-confidence!
This playful approach to development has been proven to have a positive effect. Studies show that targeted fine motor skills training with toys like a motor skills board can improve the development of important skills by an average of 15–25% . At the same time, 64% of parents report that their child becomes noticeably calmer and more balanced through focused play on the board. (Source: Mama Mo )
A truly unique item for every child (and every daycare group)
The best thing about building your own activity board is the ability to completely personalize it. Does your child love vehicles? Then add an old steering wheel and a speedometer. Are lights fascinating? Then battery-operated LED lights with large push buttons are just the thing. This way, you create a toy that reflects your child's personal interests and forges a much deeper connection than any store-bought product.
It is precisely this adaptability that makes the motor skills board so valuable for use in kindergartens or therapy practices. There, it can be used in a targeted way to achieve individual developmental goals – be it practicing everyday skills like zipping a zipper or strengthening concentration by sorting colored rings. If you would like to learn more about how to stimulate the senses through play, take a look at our magazine. We have an exciting article about sensory toys there.
The right preparation for your construction project
Anyone who's ever tried to start a DIY project amidst piles of laundry and appointments knows: a good idea alone isn't enough. Especially with a motor skills board that's meant to become a safe and long-lasting favorite toy, thoughtful preparation is invaluable. It not only saves time and frustration in the end, but is also the first step towards a truly fantastic result.
Before we reach for the saw and screwdriver, let's go through everything important. With a good plan , building your own motor skills board will be a relaxed and creative experience – for you and your child.
This brief overview shows you the best way to get started so you don't lose your way halfway through.
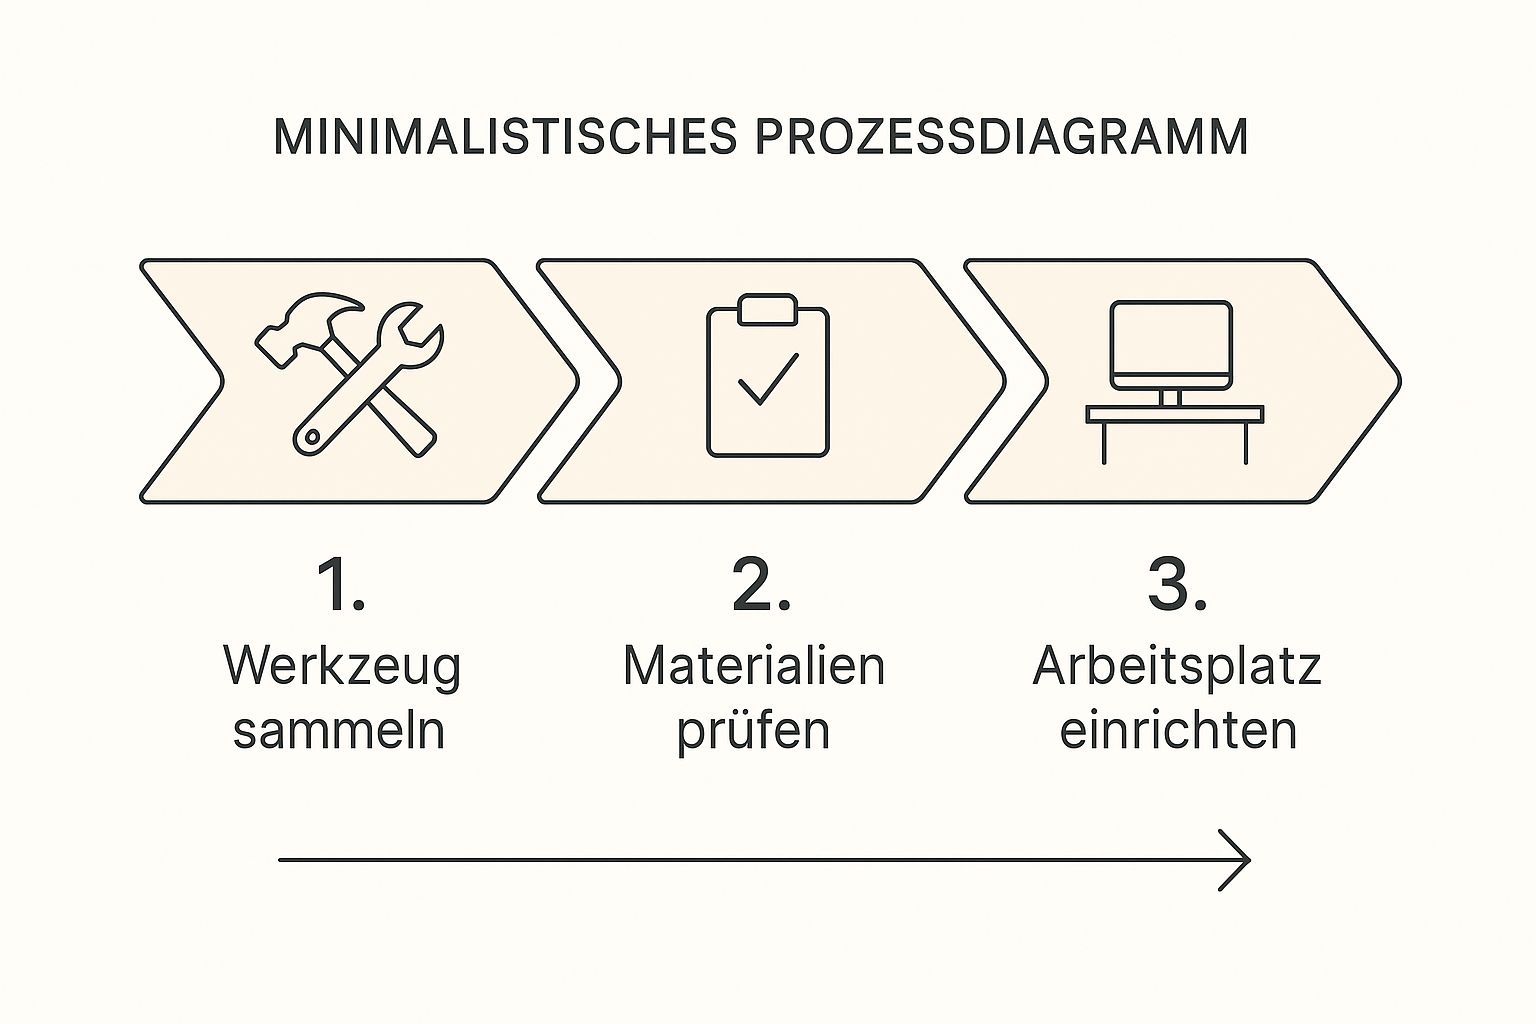
If you prepare everything from the start, you avoid constant interruptions and can fully concentrate on the creative part.
The centerpiece: The right wooden board
It all starts with the base. It's essentially the stage for all the exciting discoveries your child will make. I strongly advise you to use untreated, sturdy wood , such as birch plywood or solid pine with a thickness of at least 15 millimeters . This is important so that all the elements can be screwed together securely and nothing wobbles.
Size also plays a role. For children aged three and up, a board size between 60 x 40 cm and 80 x 60 cm has proven practical. This offers enough space for various elements without appearing cluttered, and your four- or five-year-old can comfortably reach everything while seated.
These dimensions are no coincidence. A 2023 survey of DIY-enthusiastic parents revealed that these are the most popular sizes. Interestingly, around 38% of parents reported having already built a motor skills board or planning to do so. With average material costs of only 20 to 40 euros, it's an affordable and incredibly valuable project.
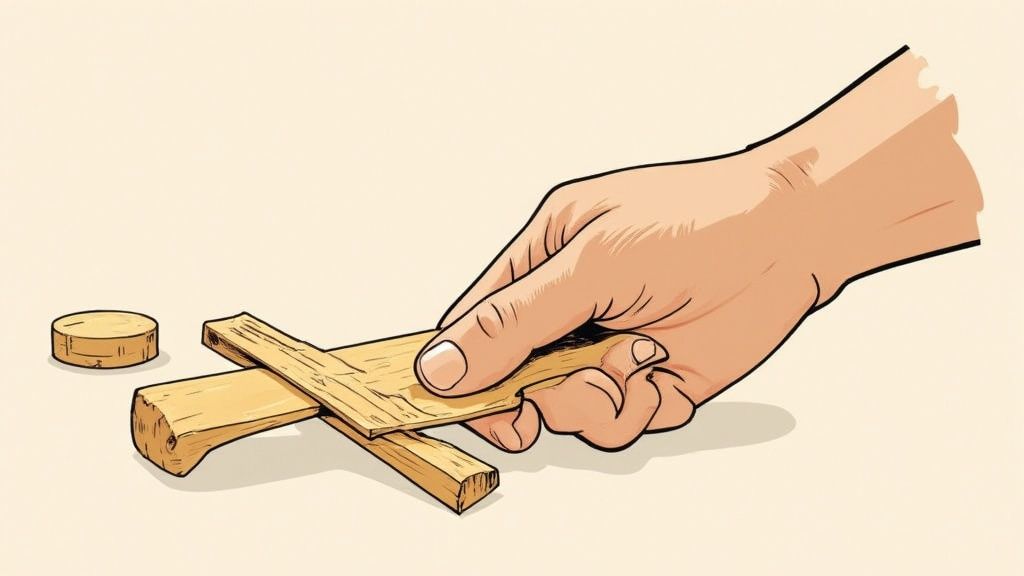
Tools and materials: What you really need
Don't worry, you don't need a professional workshop in your basement! You probably already have a lot of the necessary equipment at home, and for the rest there are often simple alternatives.
Before you begin, it's worth taking a quick look at this checklist. It will help you gather everything so you don't have to keep running back and forth to the toolbox.
Checklist of materials and tools
| category | Indispensable | Optional / For advanced users |
|---|---|---|
| basis | Wooden board (e.g. birch plywood, min. 15 mm thick) | wood saw (if you are cutting the board yourself) |
| editing | Sandpaper (various grits, e.g. 80 and 180) | Grinding machine (for larger surfaces) |
| fastening | Cordless screwdriver or screwdriver set | Wood drill bit set in various sizes |
| small parts | Wood glue (solvent-free, EN 71-3 certified), screws | Hot glue gun (for decorative elements only) |
| Measuring tool | pencil, ruler or measuring tape | protractor |
This gives you a solid foundation for your project.
When it comes to the elements for the board, your imagination is the only limit. Have a look around your local hardware store, craft shop, or flea market. Old light switches, colorful furniture knobs, small padlocks, or even an old telephone handset with a coiled cord are fantastic finds. Special tools that promote sensory experiences also make a great addition. In our shop, you'll find a high-quality sensory tool set that's perfect for such creative projects.
My personal tip: Ask around among your friends and acquaintances! Often, true treasures slumber in cellars and drawers, just waiting to get a second life on your motor skills board.
Safety first
The most important aspect when building your own motor skills board is, and always will be, safety. Especially with children from the age of three, who explore the world with all their senses and full physical engagement, we have to keep an eye on every detail. As a mother, there are no compromises for me in this regard.
Please pay uncompromising attention to these points:
- No sharp edges: Sand the base plate and all wooden elements very carefully until everything feels smooth and soft. Ideally, run your hand over it – absolutely nothing should scratch or splinter.
- Secure assembly: Every part must be absolutely tight. Wherever possible, screw through the back of the panel. Absolutely avoid small parts that could come loose and be swallowed. A child of this age should never play with it unsupervised.
- Non-toxic materials: If you wish to paint the board, use only paints and varnishes that are explicitly certified for children's toys (keyword: saliva and perspiration resistance according to EN 71-3 ).
Take your time with these steps. Safe toys are the foundation for carefree exploration and give you, as a parent or educator, the peace of mind that you've thought of everything.
This is how your individual motor skills board is created.
Now it's time to get down to business! The planning is complete, the materials are ready – off to the workshop! As a mother and enthusiastic DIYer, I'll show you how to transform a simple wooden board into a fascinating and, most importantly, safe activity board for your child, step by step. Don't worry, you don't need a professional workshop, just a little patience and attention to detail.
Before the fun begins, we need to prepare the wooden board. Even if it's already cut to size, the edges are often still a little rough. Care is essential here, because we want to create a surface that little hands absolutely cannot hurt themselves on.
Create the foundation: baby-smooth edges and surfaces
Take your time to thoroughly sand all the edges and corners of the board. It's best to start with a slightly coarser sandpaper, perhaps 80 grit , to remove any splinters and rough spots.
Next, work your way up to a finer paper, for example, a 180 grit . This will make the surface truly velvety soft. Keep running your hand over it. Only when everything feels smooth and pleasant are you finished.
If you plan to paint the board, now is the perfect time. Be sure to use a child-safe primer and a paint certified according to EN 71-3 . This standard ensures that the paint is saliva-resistant and does not release any harmful substances. Allow everything to dry completely before proceeding.
Planning the layout: with system and flow
Now comes the most creative part – arranging all the treasures! But before you reach for the power drill, first lay all the pieces loosely on the board. This will give you a good feel for the spacing and how everything will fit together later.
Try to think from your child's perspective. A clever layout can make the difference between hours of fun and quick frustration.
Here are a few tips from my experience that have really proven effective:
- Heavy items go on the bottom: Large and heavy objects like an old telephone or a small steering wheel belong in the lower section. This gives the board a stable center of gravity and prevents it from tipping over easily when simply leaning against a wall.
- Fine motor skills at eye level: Small, delicate objects like light switches, keys with locks, or zippers should be placed at approximately the eye level of your seated child (around 4-5 years old). This allows them to best concentrate on them and practice the movements.
- Create logical connections: Things that belong together should also be next to each other. A key right next to the matching lock, the light switch next to the LED bulb it turns on – that simply makes sense and promotes an understanding of cause and effect.
- Leave enough space: Make sure there is enough room around each element for grasping and handling. A child should be able to turn a crank without constantly bumping into other things. This prevents frustration and sparks curiosity.
My tip from experience: Once you're happy with the layout, take a photo with your phone before you clear everything away. This will serve as your template for assembly and save you a lot of time later!
Secure everything safely for children: screws, glue, knots
When building your own motor skills board, safety is paramount. A wobbly attachment can cause small parts to come loose and become a hazard. Therefore, it is crucial to choose the correct mounting method for each element.
When you should tighten screws:
The safest method is almost always screwing from the back. To do this, drill a small hole through the front of the element into the panel (but not all the way through!). The screw is then inserted from the back. It's best to use a washer on the back; this distributes the pressure and protects the wood. This method is ideal for:
- light switch
- Furniture handles and knobs
- Sliding bolts and hasps
- Small wooden wheels or cranks
When gluing is a good option:
Some parts simply can't be screwed together. In these cases, a high-quality, solvent-free wood glue is the best choice. Make sure it's suitable for children's toys (EN 71-3). Apply the glue generously, press the part firmly together, and ideally weigh it down overnight. This allows the glue to cure completely. Gluing is well-suited for:
- Flat wooden cutouts like animals or letters
- Mirrors made of acrylic glass (please never use real glass!)
- Pieces of fabric or felt for tactile stimulation
Special case: Fabrics and ropes:
If you want to attach ribbons or ropes, gluing alone isn't enough. It's best to clamp the end under a screwed-in wooden strip or a large furniture knob. Knots must always be doubled and extremely secure. Pull firmly to ensure that nothing can come loose.
By taking your time with these steps, you'll create a durable toy that can withstand even the wildest explorations. If you're looking for more ideas, our magazine also shows you how to make other sensory toys yourself .
Creative ideas for every age and interest
Once the wooden board is ready and the tools are within easy reach, the most enjoyable part of the project begins: the design. Every child has their own little world in their head, and that's exactly what we want to conjure up on the activity board. As a mother of two, I know how different my children's interests are. That's precisely why a self-made board is so valuable – it becomes a true reflection of a child's imagination.
The goal isn't to cram as many elements as possible into a small space. Rather, we want to create a coherent, inviting game world where every part tells its own story.
Themed worlds that delight children
A great way to create a harmonious overall picture is to orient yourself around a theme. This not only helps with the selection of elements, but also stimulates imaginative play much more strongly later on.
Here are a few ideas that have proven successful in our kindergarten and in many others:
- Vehicles and construction site: A classic that's especially popular with children aged 3 and up. Use a small, old steering wheel, a speedometer sticker, different-sized gears as the "engine," and a crank to operate an imaginary crane. An old bicycle bell becomes the horn.
- Enchanted Forest and Nature: Here you can really let loose with tactile elements. Mount small doors behind which pictures of forest animals are hidden. Rough tree bark, soft moss (glued to a piece of wood) or smooth stones offer exciting tactile stimuli.
- The small home: Everyday objects are the focus here. An old light switch, a doorbell button (with a gentle "ding-dong"), a padlock for the front door, or a zipper on a piece of fabric symbolizing a jacket.
My tip: The best idea is always the one inspired by your child. Observe what they love to play with most. Is it the vacuum cleaner, the remote control, or opening cans? These are exactly the perfect elements for your board.
Growing challenges for young professionals
A three-year-old has different motor skills than a five-year-old. A good motor skills board, however, can grow with the child or offer elements for different difficulty levels from the outset.
Especially for older kindergarten or preschool children from the age of 4 or 5, you can integrate more challenging tasks. This keeps their interest alive and specifically promotes the skills that will soon be important in school.
Challenging elements for older children:
- Practicing tying shoelaces: Thread a thick shoelace through two rows of eyelets. This is the perfect preparation for tying your own shoes.
- Simple combination locks: A small bicycle combination lock, whose code might be the date of birth (e.g. 1-2-3), promotes number sense and fine motor skills.
- Screw caps: Empty, clean spice jars with screw caps train the rotational movement of the wrist, which is crucial later when writing.
These small challenges make children incredibly proud when they overcome them. This strengthens their self-confidence and frustration tolerance.
Appeal to all the senses
A motor skills board is much more than just a tactile and grasping board. We can easily incorporate elements that specifically stimulate other senses and make the play experience even more intense.
For the eyes:
Safety LEDs, which are switched on and off with a large push button, are fascinating. A small, unbreakable acrylic mirror awakens curiosity and promotes self-awareness.
For the ears:
A simple bicycle bell, a small bell on a string, or different materials that make different sounds when tapped (wood, metal, plastic) train the ear.
To feel:
Think beyond smooth wood. A piece of crackling oven bag under a square of fabric, a soft pom-pom, a rough doormat, or corrugated cardboard offer a wealth of sensory experiences.
Experience shows that a typical homemade activity board in Germany comprises between 10 and 15 different elements . Parents spend an average of 3 to 5 hours building it, paying particular attention to using non-toxic materials. The effort is worthwhile: 70% of children use their personalized board as one of their favorite toys for at least a year. You can find more information about building your own activity board at tedox.de .
This keeps the motor skills board interesting for a long time
Congratulations, the board is finished! All the screws are in, the paint is dry – now the fun can begin. But the true magic of a homemade activity board unfolds over time. It's not a one-off attraction, but a faithful companion that can fascinate for months, sometimes even years. From my experience as a mother, I know: The key is to discover the board together and reinvent it again and again.
The biggest mistake would be to simply place the board in the child's room and leave them alone with it. Only through gentle guidance from us adults does mere experimentation transform into genuine, imaginative play.
Game ideas that spark the imagination
The individual pieces on the board aren't just switches and latches. They're invitations to little worlds of adventure. Try sparking your child's curiosity with playful tasks and stories. This not only trains their little fingers but also promotes language and logical thinking along the way.
Here are a few ideas that are always well-received at our house:
- Small search tasks: Start simply with "Where is the blue light switch hiding?" or "Can you open the lock with the round key?". This trains the perception of colors and shapes.
- Invent stories: Transform the functions into a short narrative. "Oh no, Teddy is locked behind the door! Can you quickly help him and slide the bolt open?" Suddenly, a simple exercise becomes a heroic rescue mission.
- Role-playing games: The board can be anything! A spaceship cockpit, a fire station, or the control panel in a secret workshop. "Attention, pilot, we need to turn on the landing lights!"
Tip for professionals: In daycare or therapy settings, a board like this is a goldmine for targeted developmental exercises. Asking "What sound does the bell make?" promotes language development, while opening a buckle provides practical training in everyday skills like dressing. This playful approach can support the therapy plan.
A board that grows with you
Children develop incredibly fast. What's a tricky challenge today can become routine in three months. The brilliant thing about a homemade motor skills board is its flexibility. Nothing is set in stone.
View the board as a living project. Observe your child and simply adapt the elements to their new skills and interests.
This keeps the board interesting:
- Replacing elements: Is the simple sliding bolt no longer an obstacle? Then replace it with a small padlock and key.
- Introduce new tasks: Is your child starting to show an interest in numbers? Add to an old combination lock or stick numbers next to the switches.
- Adjust the difficulty: A simple zipper can easily be replaced by a shoelace, which can be used to practice tying bows.
These small changes take hardly any time, but show your child: I see you and everything you can already do! This way, your motor skills board becomes a truly sustainable and pedagogically valuable toy that accompanies and supports your child on their developmental journey.
Typical questions that arise when building a motor skills board
A DIY project for your own children? Of course, questions arise. And that's a good thing, because safety and fun are paramount. As a mother and entrepreneur, I've built countless of these boards and often exchanged ideas with other parents and educators. Here, I've compiled the most frequently asked questions and answered them based on my practical experience – so you can confidently embark on your own project.
For what age group is such a board actually intended?
I get asked this question really often. My observation is that children around three years old benefit most from a homemade activity board. At this age, their fine motor skills are already so well developed that little ones can enthusiastically master even trickier tasks like small locks, buckles, or simple screw-on lids. A four- or five-year-old child can also concentrate for longer periods and solve more complex tasks.
Another important point: The phase where everything immediately goes into the mouth is usually over by then. This makes the whole thing much safer. Of course, you can also design a board for younger children, but then please only use very large, securely mounted, and simple elements. Absolutely no small parts!
Which wood is the best choice for the base plate?
The wooden base is the foundation for a durable and, above all, safe toy. I always use sturdy, untreated wooden bases . Birch plywood or solid pine or beech have proven to be the best choices.
Make sure the thickness is at least 15 millimeters . This thickness is crucial to ensure that all screws you insert from the back are properly tightened. This way, nothing will wobble or tear out, even if your child plays with a bit more enthusiasm.
How do I attach the parts in a way that is truly childproof?
There are no compromises here. The safest method is and remains screwing from the back . To do this, drill through the respective element into the panel from the front, but be careful not to drill all the way through. Then, screw in the appropriate screw from the back.
My personal tip: Always place a washer under the screw head on the back side. This distributes the pressure and prevents the screw from pulling itself into the wood over time. Everything will stay rock solid, I promise.
Where screws simply aren't an option, you can use a high-quality, solvent-free wood glue . Look for the EN 71-3 certification – this is the standard for children's toys. Even so, you should regularly give all the parts a gentle shake to check that everything is still firmly in place. A simple routine that provides a significant increase in safety.
Which everyday objects are suitable and safe?
The great thing about building your own board is precisely the creativity and the opportunity to give old things a new life. Many household items are perfect and make the board truly exciting.
Here is a short list of items that have proven useful to us:
- Old light switches (of course without a power connection)
- Sturdy zippers, for example from a discarded jacket
- Empty, clean spice jars with large screw-on lids
- Large, rounded furniture handles and knobs
- A discarded telephone handset with a retractable coiled cord
- A simple bicycle bell that can be pressed or turned.
However, you should absolutely avoid anything that has sharp edges, could easily break (like thin plastic), or consists of small parts that could come loose.
Conclusion: Sensory toys are an investment in the future.
Sensory toys promote motor skills, concentration, language, emotional balance, creativity, and social skills – a foundation for life that supports inclusion and counteracts digital overload. In a digital world, they offer tactile experiences that are essential for healthy development and help prevent future challenges such as learning disabilities.
Start with DIY or choose our Flowfull Sensory Box for clean, sustainable fun – an investment that will strengthen and delight your child in the long term.
Imagine seeing your child engrossed for hours in a game that not only entertains but truly promotes development – without chaos, without frustration.
As a mother, that's exactly what I wanted for my own children: to playfully support their development, awaken their senses, and prepare them for the world.
But what about reality?
The market is flooded with toys that are either too complicated, too messy, or simply unsustainable. It was frustrating to find products that are safe, educational, and practical for everyday use – not sandboxes that ruin the floor or plastic sets that break easily.
That's exactly why I founded Flowfull: to offer parents like you a real alternative.
Our sit-in sensory box with creative cubes made from sustainable larch wood is more than a toy – it is a clean, foldable world of discovery.

Children aged 3 and up immerse themselves in tactile adventures:
Grasping, pouring, sorting – without dust or mess. Antibacterial, washable, and weatherproof – perfect for home, daycare, or therapy. It promotes fine motor skills, concentration, and sensory integration while you relax and watch.
Ready to bring this magic into your everyday life? Try our Flowfull ® Sensory Box – visit our shop and discover endless fun.
But don't just let me tell you – listen to what the experts say:
Experienced educators and therapists share their real success stories with our cube bath here:
Expertise that inspires: Flowfull® sensory toys put to the test
How it captivates children for hours, creates moments of calm, and boosts development. From Saskia Wedel, early childhood educator: 'The Flowfull cube sandbox is a wonderful addition to my parent-child groups. The children explore it with such curiosity and concentration – wonderful flow moments are created.' Such testimonials have inspired and validated us.